Monday, July 25, 2016

Kimono Jacket using Island Batik Rayon

In our last Ambassador box from Island batik we each received some of their Rayon - so soft and yummy!  I was so excited, then got stuck trying to figure out what I could make out of a 1 yard piece.  I've been looking because my mom and I used to have several patterns for 1 yard tops, but I have not been able to find a single pattern that I could use.  I set aside an afternoon two weeks ago and went to the local Joann's store and spent some time browsing through books.  I didn't find a top, but I found a pattern for a cute jacket!

Unfortunately the jacket took way more than a yard, but I couldn't get it out of my mind.  I finally went back and bought the pattern -
I knew I had a large piece of yardage I could use for the bodice, and the rayon would be perfect for the flounce!  I was still short a bit, but simply shortened the bottom of the flounce by an inch and had to be content with upside down turtles for part of the top.

This was a super fast and easy project to sew - and I will definitely make myself at least one more of these.  I'm not a great selfie taker, but here are pictures of my finished jacket:

 I thought it was cute with my white jeans!
 I was between sizes on this, so made the large size.  I will definitely make a medium next time.
And the back view - as you can see, plenty of coverage, definitely roomy enough!

This makes a great lightweight jacket.  I pre-washed both fabrics before making my jacket.  The rayon washed up wonderfully - barely any shrinkage, and I think the batik rayon is not quite as maddeningly slinky as regular rayon is, so it was pretty easy to pin, cut and sew.  It hemmed like a dream.  I would love to make the entire jacket out of rayon for my next attempt!  For the bodice I used SEASHORE - 111623103 from the Seashore collection.

Here is what I started with this spring in my Ambassador box.

I've reduced this box full of batik goodies down quite a bit at this point, the remainders fit in a small basket!  I can't wait until the blog hop in August - you are going to love the quilt I am making for that.  I think I'll be using that Auriful thread in the light puple to quilt it.  That's not happening until the middle of August, but I'll give you plenty of warning in advance.  There will be prizes, of course!  And lots of great quilts.  I am telling you that this group of Island Batik Ambassadors is a creative bunch - and so much fun to work with :)  I am a blessed lady to be included!

And now I am off to get my week started.  I have three customer quilts to finish, and a shop sample for Threads That Bind.  Should be a fun week, lots of quilting for sure!

Sunday, July 24, 2016

The Week of Flimsies

I had a busy week in the sewing room this week - so busy I forgot to blog about it!  It all started when we spent last weekend up north visiting the kids and grandkids.  We drove all the way up to Puyallup,  WA to see one of our daughters compete in a weight lifting competition.  She was awesome, completing all 6 of her lifts in good form!  It was her first competition and I think she is hooked.  She said the adrenaline rush was fierce, when she went out on the platform the first time she definitely felt like she was in fight or flight mode and wanted to cry, but she was awesome!  We definitely saw her confidence level rise with each lift and really enjoyed seeing her do so well.  We spent the rest of the weekend in Portland, then drove home on Monday.

I knew I had a short, but busy week in front of me, so just got to it on Tuesday.  My friend who owns the local alteration shop that I help out for is going to be on vacation for the month of August, so she had passed a few gowns on to me that needed to be done before she left.  I spent a good part of my week doing that, but also went to work on some of those tops (flimsies) that I have been wanting to get done.

This one is made with leftovers from another top.  These half square triangles were too big to discard, and I ended up with a nicely sized top in the end:

I had already made all the blocks, so it was just a matter of adding the sashing and borders.

The next one was a cheater panel.  I had more panel than border print, so it's just been aging in the drawer.  When I pulled it out this time, I realized that I could cut a row of blocks off in each direction and use them for cornerstones.  I have three blocks leftover that could be pillows, or small quilts.
This one will also be a nice lap size quilt.  I love the colors in this one!

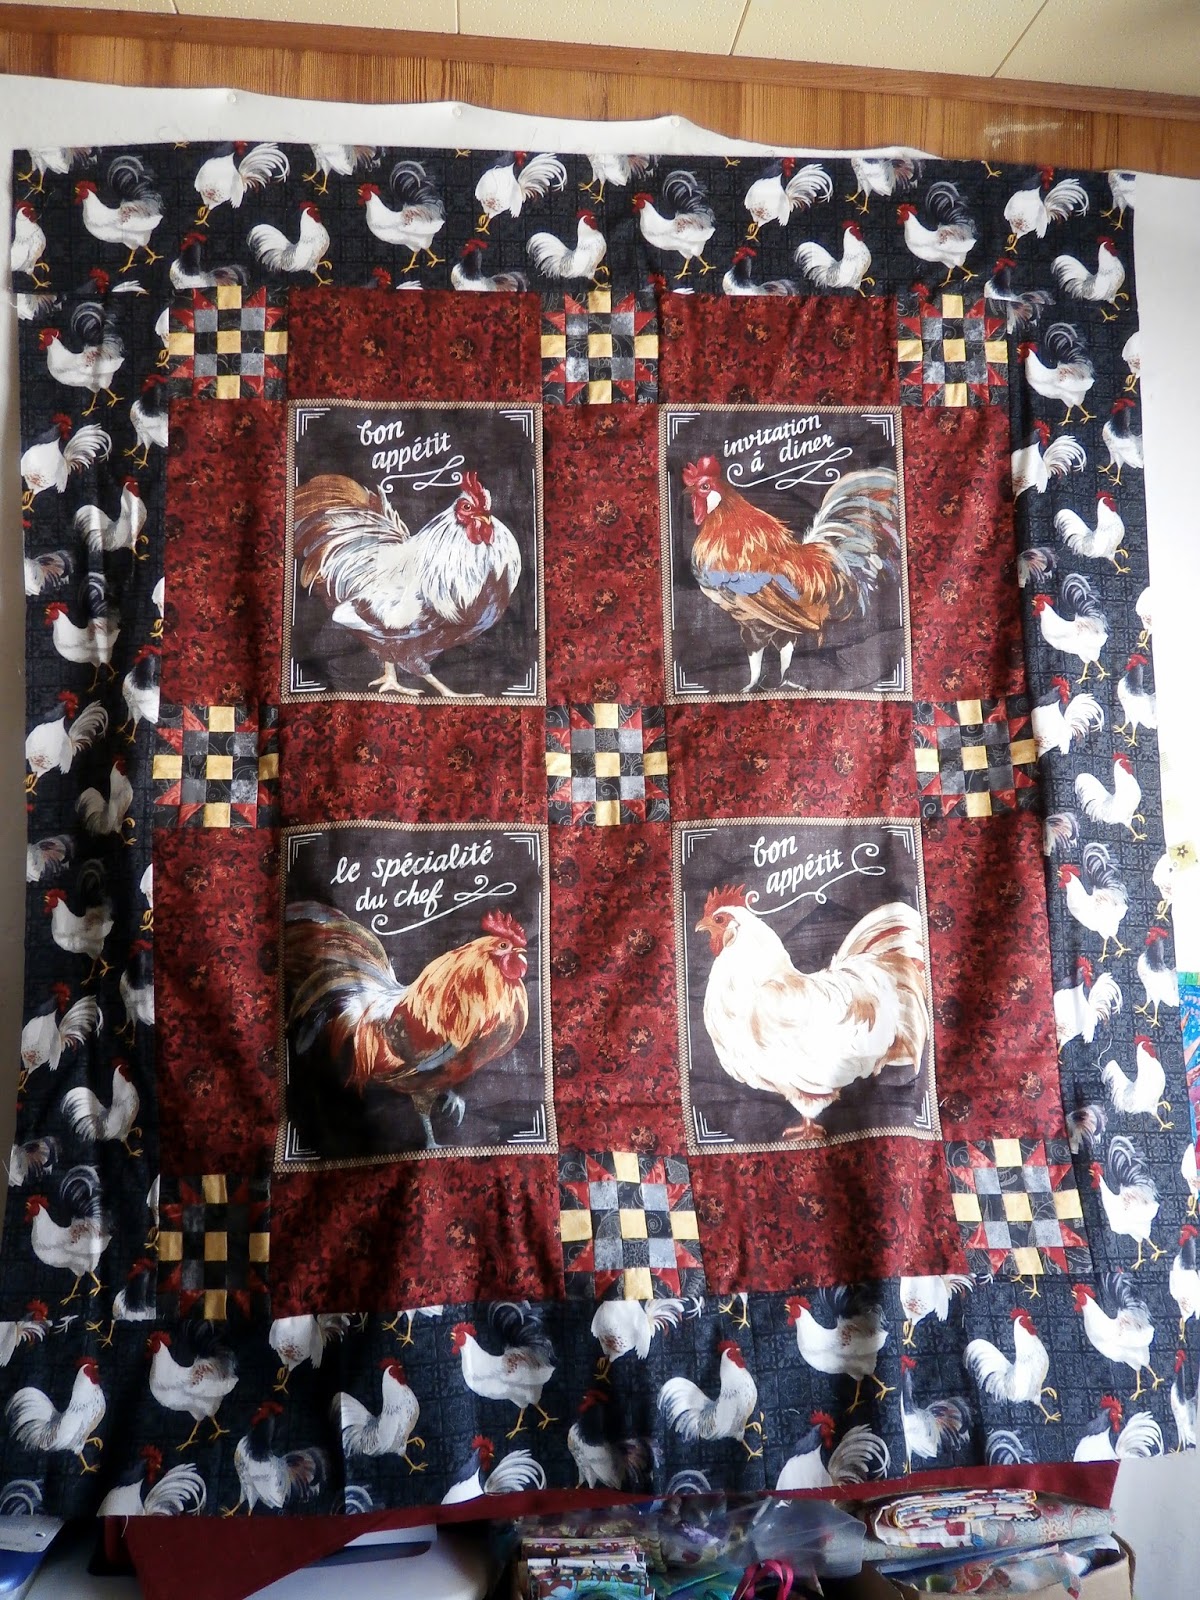
Another quilt made using a panel, but for this one I had planned 5 inch pieced blocks for cornerstones.  It was a lot of fun to make the small blocks and I have another lap size quilt top ready to be quilted:
Aren't the chickens fun?  I know someone is going to love this quilt!

It's time to set up the Christmas display at the quilt shop, so I have a couple of samples to put together.  This one is from my Jolie pattern.  I absolutely adore the truck fabric in this - we have a lot of red and gray prints this year in the shop.
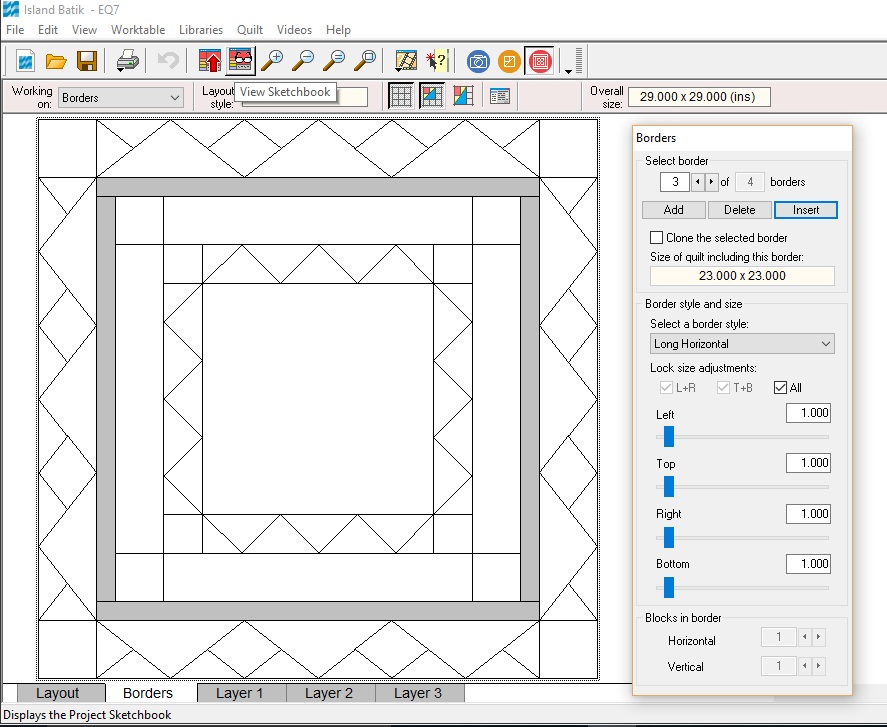
This one will get quilted first, I have backing for it and want to take it in on Wednesday so we can start selling the fabric.  Last, but not least, I added the borders for my quilt for the Island Batik blog hop next month!  My quilt shows the Seashore line - here is a peak at the borders I used:

You can read more about the line here on Auribuzz (Aurifil Thread's Blog) as well as enter to win some of these gorgeous fabrics!  It's a lovely line and you will enjoy reading about Tammy's role in designing it and putting together an Aurifil Thread collection to go with it.  While you are there, make sure you read the whole week's worth of posts, as they all feature great giveaways and feature Island Batik and Aurifil thread collections.  Two of my favorite things in the whole world - and not just because I am an Island Batik Ambassador and receive free fabric.  It truly is awesome fabric that is a pleasure to work with!

That makes a total of 5 quilt tops ready to be quilted!  I need to pull together backs for 4 of them, so it might not happen this week, but I definitely know I'll be finishing lots of quilts in August.

Just a fun note - I entered 8 items in the County fair this year.  Five of them were Island Batik projects!  Those monthly challenges have not only been a lot of fun to do, but I am getting a nice pile of quilts out of it as well.  I am trying to finish up some of my older projects, but I sure do love creating something fresh and new, and these monthly challenges have inspired and stretched me.  I think that's why we quilters love the quilt-a-longs, challenges, and mystery quilts.  They give us opportunities to be creative and make quilts while being part of a community.

I hope you find a way to use your creativity today!

Friday, July 15, 2016

Some Quilting Fun!

Besides finishing up my Christmas in July project for Island batik, I have spent a good part of my week just having fun.  I opened up my drawer of orphan projects and pulled out a pile of blocks, looking for a quick and easy project to work on just to enjoy some simple sewing and quilting.  The first one I pulled out was a block in red and green that was 15 inches square.  I looked in my stash and found the perfect shade of green - added them for borders and layered it for a quick quilting job.  I picked a red thread and did a swirl hook design.  I was so happy with this I went on to quilt my CIJ project with the same design!  Here is the finished quilt:

Well, that was so much fun I had to find another project to work on the next day!  I picked a mini snowball and nine patch block that was ready to go.  I quilted this one in swirls:

How could I stop at this point?  Yesterday I pulled out another block - May Roses.  Feeling creative, I added a border to my block, set in on point with one of the fabrics in the block, then another border.  Really had fun with the quilting on this one.  I did some flowers, adding leaves, echoing and spirals.  Yes, I did enjoy the quilting a lot on this one!  Small quilts are the best for playing with free motion practice!
Besides quilting for fun, I also put together a sample for Threads That Bind - a Fall Charmer table runner using a Welcome Fall charm pack.  I did a quick swirl pattern on this in orange.  Bold thread seems to be my choice this week!
No quilting today, but I did put together a couple of tops for quilting later.  I've really enjoyed some good creative sewing time this week and it has done me a world of good - I just feel happier and more at peace.  Sometimes it's good to just make something with no real expectation or purpose in mind for it!  Of course, I've added the first three to my Etsy shop, but I really just made them for the fun of finishing something quickly.  Next week I have some deadlines again, but I hope to add in some fun quilting as well.  I still have a good pile of orphan blocks to deal with (wink)!

I'm linking up with Myra of Busy Hand Quilts for Finished or Not Friday:

Finished or Not Friday at Busy Hands Quilts

Come join the fun!

Wednesday, July 13, 2016

Christmas In July - Island Batik Ambassador Challenge

I've sure had a good time this week working with the Holiday Happenings line!

  It's a fun mix of traditional Christmas colors and outdoorsy prints.  The second border I made from the fat quarter of an animal print.  So perfect for anyone who likes the outdoors - bears, rams, fish bears, elk...all on a lovely tonal green, red, purple, gold background.  Absolutely beautiful!  I added a pretty neutral print with swirls on pine needles for the cornerstones.  For the third border I did a narrow gold strip.  Then I was ready for the final pieced border.


When I started I wasn't sure whether I was going to go with the red triangles pointing out or in.  I liked them turned out the best.  Then I fussy cut four more of those great reindeer for the corners.  Here is where one of my favorite things about batiks came in really handy!  All the reindeer were leaping in the same direction on the fabric, but I could use the reverse side with no problem so that I could have them leaping in toward the center on both sides of the quilt.  


At this point I felt that my quilt was complete so layered in and quilted it - I decided to use an overall swirl and hook design with red thread.  I was really happy with the results.  My June challenge had so much detailed quilting that it was really fun to make a quilt with an overall design - and it was quick!


The swirly design really goes well with the swirls in the background of the reindeer fabric!  I finished it up with a binding in the swirly pine needle fabric.  As always, it's a pleasure to work with the beautiful fabrics that Island Batik provides me as an Island Batik Ambassador!  It really is an honor to work with their company and I appreciate their generosity in providing me with such delightful material to sew with.

I love my finished quilt!  I've been wracking my brain to come up with a name for it, but so far I've come up lacking - I'd love a suggestion if you have one.  Thanks for following along on my journey of making my Christmas in July Challenge!


Sunday, July 10, 2016

Designing a Medallion Style quilt in EQ7

I can't believe it is the 10th of July already, this summer is just zooming past.  This month Island Batik is partnering in the 25th anniversary of Electric Quilt - they will be giving out a copy of the EQ7 software, so make sure you enter for a chance to win that, as well as entering on the Electric Quilt website for a bundle of Island Batik fabric!

I thought I would share some tips for designing a medallion style quilt this month (my Christmas In July challenge for Island Batik is a medallion quilt).  EQ7 has a variety of border styles that make this a fun and creative process.

First you need to start out with your quilt layout.  I just wanted one 12 inch block as my center, so after adding a few choices into my sketchbook I started a new quilt, using a horizontal layout.  I then clicked the first tab (layout) and after selecting 1 block horizontal and vertical set my block size at 12 inches.

 Next step is to go to the second tab (borders) and start selecting your borders.  Your layout will probably start with one border already present.  


As you can see, there are quite a few border styles to choose from.  It's a lot of fun to click on each one to see what happens.  There are additional options for the different border styles as well, you can usually adjust the number of units in the border, and the width of your border.

To see how the block will look with your center block you click the Layer 1 tab.  Color the border just as you would a block.  If you use the control key you can color all the units on each side at once - that makes it quick and easy.
I used this as my second border because I liked the way it reflected the triangles in the block.  Now you can go back to the border tab and add another border by just clicking add.  I wanted to make this border a plain border with corner blocks and knew that I would have to cut the strips at 3 inches, so selected a 2.5 inch border with cornerstones - simple and easy!
The next border I wanted to add would be a pieced border.  I chose Big and Little Points out for this one, but once it was colored decided that I wanted this border to be the final one and wanted to add an accent border inside of it.
So I went back to the borders tab, clicked insert and added my border:
I was happy with this layout, and after a bit of trial and error in adjusting to the sizes I was able to get that last border to have pieces that were square and easy to rotary cut and sew.  I'm not going to go through all of that right now, but I worked it out by selecting the border pieces after I colored them and using the print menu to see what the rotary cutting measurements were.  I found that by making the accent border 3/4 of an inch and the outer border 3.75 inches that the angles and measurements worked out perfectly.  If you can't adjust your measurements to work like this, you can also use the print menu to print out templates and cut your pieces that way as well.

And here is my finished design!  You'll have to wait to see the actual quilt until later this week, I have to finish sewing it.

I hope you've enjoyed this overview of how to add borders to make a medallion quilt on EQ7.  I love all the possibilities of working with the different border options.  You can also add blocks to the borders - which make the options infinite, as well as super challenging to sew!  Here is a fun design I came up using the same borders, but a different block in the center, and playing with setting blocks in the border patches:


I could go on playing with this for hours!

For more ideas about using EQ7 make sure you check out Quilt Shop Gal's Blog - she has been linking up several bloggers on the 10th of each month as we celebrate Electric Quilt's 25th anniversary - and make sure you use the #EQ25 on social media - I was a winner for their May social media giveaway!

Saturday, July 09, 2016

Chistmas in July Border One

I added the first border to my Christmas in July project  This is the Points Out border in EQ7.  I thought it was perfect for my quilt - I like the way it echos the star point triangles.  I wanted to introduce one of the lighter fabrics in my fat quarter bundle, and I think it sets off the center very nicely.

The second fabric I used is the Christmas tree fabric.  This is a fabric I could see myself using a lot - it's not strictly a Christmas fabric, just a nice pine tree design that would works in lots of projects!
Since it is directional I had to think about the cutting for this one!  It worked out perfectly because I used the same method for cutting the triangles as in the Ohio Star block.  It takes two 5 1/4 inch squares cut in half diagonally so I just had to makes sure to keep the triangles sorted correctly.  It's a little tricky sewing the triangles to each other because you have to offset them just right, but if you put a pin through the seam line at the corners it's easy to match them up just right.

I used this fabric for the corners - another favorite:

I'm having a great time designing as I go with this project!  I'll probably add another 2 or three borders, then call it done.  Tomorrow, I will show you  how I use EQ7 to design a medallion style quilt - this is a fun way to make a quilt that isn't just blocks and sashings.  Plus I have some tips on making sure your units are a size that is easy to cut.

Friday, July 08, 2016

How to Cut and Sew an Ohio Star Quilt Block

I wanted to make a smaller quilt for the July Island Batik Ambassador Challenge.  I picked out a pattern and decided the fabrics, but when I was at that point happened to see a pretty medallion quilt and thought to myself  "that would be fun!"  Uh-oh!  The idea stuck, so I decided to start out with a center block featuring this adorable reindeer fabric and see how far I get through the month.  Luckily I have EQ7 to help me with the border options, and when I run out of fabric, or decide I've had enough I'll finish the quilt up!

One of my favorite blocks is the Ohio Star, so I decided to make this my block center.  I've made several quilts featuring this block:

This mini sampler quilt has three of them.

The Crown of Thorns block is a variation of Ohio Star.

Here is a mini version with sashing and curved edges.

And this one, set on point is a block of the month quilt I won at a guild meeting many years ago!  As you can see, this is a versatile block and can be used in a variety of ways.  The history of this block dates back to the Civil war, when block quilts began to be popular.  The name came later, and though it goes by some other names Ohio Star seems to be the most popular.

This is a Nine patch block and is made from only 2 units.  4 squares made of quarter square triangles and 5 plain squares.  I chose a three color variation for my Christmas in July quilt.  I wanted to show you how to make this block, so picked some fabrics from my earlier Island Batik boxes to make this sample block in blue.  To make an Ohio Star block you will need:
  • One center square 4 1/2 x 4 1/2 inches.  (I fussy cut my Christmas in July version!)
  • Four corner squares 4 1/2 x 4 1/2 (background fabric)
  • One 5 1/4 inch square background fabric cut in half diagonally both ways
  • Two 5 1/4 inch squares star point fabric cut in half diagonally both ways
  • One 5 1/4 inch square accent fabric cut in half diagonally both ways

To make the star points, sew the star point triangles to the background and accent triangles to make half square triangle units.

 Make sure you sew with the star point triangles all on the same side - this way they will be opposite each other when you sew the half square triangles together!  Press toward the dark fabric.  Sew the pairs together, matching the center seam. Press this last seam as desired.

 Trim block down to 4 1/2", make sure to center the block and that the seams go from corner to corner!


Lay out your block - background squares on the outer corners, fussy cut square in the center and accent triangles facing the center square.  Sew together, making sure you match your triangles at the corners of the center block.  Now I'll show you my finished center for Christmas In July:


I just love this reindeer print!  I definitely want to add a few more of these to my quilt somewhere...we'll see where I end up going with this.  I'll be posting on Sunday showing how I am designing this in EQ7 - I think it's going to be a nice little wall hanging when I am done.